Showing posts with label your. Show all posts
Showing posts with label your. Show all posts
Thursday, February 12, 2015
How to Find the Websites or Blogs that are Copying your Content

The websites or blogs that copy your content are actually committing Black-Hat SEO, which is something that Google punishes sites for. The trouble is that Google does not know who the duplicator is, and so will often punish both sites for duplicate content. This means that if another person copies your content, then they are also dragging your website down with them too. Added to this, is the insult that you have invested time (or money) into your web content, and now somebody else has come along and is stealing it.
Also Read: Tips on How to Have Better SEO Results with Link Building
CopyScape is a very good plagiarism checker
It is good because it has a reasonable mix of economy and quality. The truth is that there are some better plagiarism checkers out there, but they are very expensive when compared to CopyScape. On the other hand, do not let price fool you. There are some plagiarism checkers out there that are far more expensive than CopyScape and yet are not nearly as good as CopyScape.
This is a tool that you can use which will check the search engines for your content. The truth is that if the duplicate (plagiarized) content is not indexed by Google or Bing, then CopyScape is not going to find it. However, if Google or Bing has not indexed your plagiarized content yet, then there should not be any search engine penalizations.
You can check up to 2000 words in one go, and it only costs 5c. Or, you can load a number of text-filled documents into a batch search and it will check them all for you. It keys in on chains of three words. It also has a tolerance of around 5%. This is because some websites are going to have chains of three words that are the same as yours; however, if this occurs for more than 5% of the page, the CopyScape tool will show you a result. This does sometimes produce false positives, but they are few and far between.
CopySentry can stand guard over your content
If you are concerned that people are going to steal your content, then you can have CopySentry run a check on your chosen web pages every week. It is a tool offered by CopyScape, and it means that you will not have to keep running plagiarism checks manually. Also, as you can imagine, there is a small service charge for doing this, but CopyScape allows you to buy credit so that you will not have to make a payment every time it runs a check. CopyScape takes PayPal payments too, so you do not have to worry about entering your card details.
Also Read: Best Way to Easily Find and Remove Broken Links from your Website or Blog
CopyScape free URL searches
Every day you are able to run five free searches on the URLs of your choice. That means that if you were so inclined, you could check 35 pages per week for free. The tool will check the entire page and then show the pages that have been copied by others. If it does find copied content, the results it gives are pretty good. It will show you how many domains have the content, and you can click on the link to see what parts are copied from your website (or content). It will tell you how much of the page has copied content via a percentage, and it will highlight any copied content in red.
Google your own topics to look for plagiarism
When somebody re-writes your content or copies your content and hides it from the plagiarism checkers (it can be done), they are often uncreative in choosing a new title. All you need to do is Google your own page titles to see what turns up. Hopefully, you will see your own page riding high in the search engine results. Look around the search engine for articles with similar titles, and you may just come across your article that has been hidden from the plagiarism checkers.
Also Read: The Top 10 Websites to create free Logo for your Blog
You will have trouble finding spun content
This is true because according to a web crawler and plagiarism checker, if an article has been spun then it is new. Of course, it is not new by human standards, and if you are unlucky enough to read it then you will see that it makes very little sense and that it flows as well as syrup from a coffee filter. Nevertheless, for some reason people still do it, and it is possible to file a cease and desist order if you find content that has been spun from your content because it is still plagiarism.
About Author:
Kate Funk coaches individuals in SEO and business networking skills at Tutortop.

Tuesday, February 3, 2015
Zoom your presentations with pptPlex

pptPlex uses Plex technology to zoom in and out of slide sections and move directly between slides that are not sequential in your presentation. You can arrange all slides on a stunning canvas and can zoom in or zoom out slides during presentation besides navigating in a non-linear fashion. You need not to go slide by slide, just double click any slide thumb on the canvas and slide will appear with smooth zoom effect.
pptPlex also lets you add live content from other Office documents(Word, excel) in your PowerPoint presentations. Live content means if you have added some excel sheet and source data gets changed, your presentation will always have the updated data as will read the data from excel sheet itself.
You can download pptPlex from Microsoft labs. You would also require to download and install XPS or Save as PDF add-in in order to use pptPlex on PowerPoint 2007.
pptPlex is quite easy to use and for sure it will add some seasoning to the way you give presentations.
![Reblog this post [with Zemanta]](https://lh3.googleusercontent.com/blogger_img_proxy/AEn0k_s5c-ursOPYlErjbzSJbl84M6fSPFd1e_zO9CQoO0r1WcMmQ_w5xFmkIHiX56TrSOXmpNxhRKWJ-APcYag3CA0Ac2kxU7CirwYt_pfBxLteR4C12VYaEMP1aQSJ7B9Z0o3bQYlbhWb7jhOL2uj-Fqs6=s0-d)
Monday, February 2, 2015
View PowerPoint presentations on your iPad or mobile
authorSTREAM, the PowerPoint sharing platform which recently launched win-iPad contest has come up with an iPad compatible version of presentation output. As mentioned on authorSTREAM blog, all latest presentations are iPad compatible and loads in a HTML player.

This means that now authorSTREAM presentations can be viewed on any non flash browser running on iPad, iPhone or other mobile devices.
Only downside is that iPad output dont have any animations or sound. authorSTREAM claims that they will be adding animation and sound capabilities to iPad output soon.
Sunday, February 1, 2015
Perform Hard Reset in your Samsung Galaxy Y S5360
Hi,
This is a bit old school phone. But I have still decided to make a tutorial just for the people that do not know how to hard reset / factory reset their Samsung Galaxy Y (S5360).
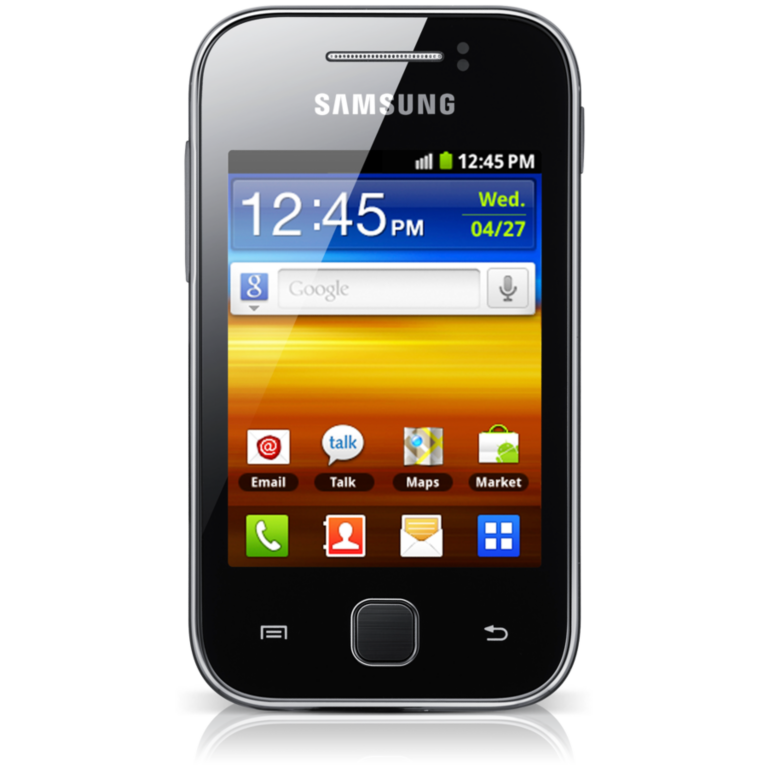
This procedure is almost identical to high end phone like Galaxy S3, Galaxy S4 and other Samsung devices.
NOTE: As I have always said, this will erase all your data such as contacts, messages, pictures, mp3 etc.. etc..
Here is the procedure
1. Turn off your phone
2. Press and Hold VOLUME UP + Home Button + POWER Button
3. Release the button when you see the Samsung Galaxy Y logo
4. Select wipe / factory reset, to navigate press the volume rocker, to select press the Home button
5. Reboot your phone
NOTE: If the process did not succeed you need to wipe the cache first before performing a wipe / factory reset.
I hope this tutorial help you.
Read more »
This is a bit old school phone. But I have still decided to make a tutorial just for the people that do not know how to hard reset / factory reset their Samsung Galaxy Y (S5360).
This procedure is almost identical to high end phone like Galaxy S3, Galaxy S4 and other Samsung devices.
NOTE: As I have always said, this will erase all your data such as contacts, messages, pictures, mp3 etc.. etc..
Here is the procedure
1. Turn off your phone
2. Press and Hold VOLUME UP + Home Button + POWER Button
3. Release the button when you see the Samsung Galaxy Y logo
4. Select wipe / factory reset, to navigate press the volume rocker, to select press the Home button
5. Reboot your phone
NOTE: If the process did not succeed you need to wipe the cache first before performing a wipe / factory reset.
I hope this tutorial help you.
Thursday, January 29, 2015
MyPhone Storm TV stock rom to unbrick your phone
Hi all,
I now have the firmware or stock rom for your MyPhone Storm TV. If this is your first time to flash, unbrick, or reprogram ( or whatever you call it) I also have a tutorial below. Which I think you can follow. Just read and follow carefully.
I now have the firmware or stock rom for your MyPhone Storm TV. If this is your first time to flash, unbrick, or reprogram ( or whatever you call it) I also have a tutorial below. Which I think you can follow. Just read and follow carefully.

Firmware Here -->MyPhone Storm TV
VCOM Driver -->VCOM Manual
Alternative Driver --> AutoInstaller
Alternative Driver --> AutoInstaller
SPFlashTool --> SPFlashTool
SPFlashTool --> LatestVersion
"Extract the files to your desired folder" See picture below"
"If you encounter an error in Flashtool, use different version of it"

Installing Driver
First try the Alternative Driver, which is the AutoInstaller. Just open the install.bat then it will automatically install the driver. Then proceed to flashing. If it did not work then proceed with VCOM driver that you had downloaded. Then install it manually follow the guide below.
Video Reference using Driver Auto Installer (watch in HD)
When installing it manually your phone must be turned off, then connect it to your computer/laptop while pressing VOLUME UP or VOLUME DOWN. This will detect and look for the driver.

1. This is the first time that you will connect your phone and it will search for the correct driver.

2. Check include this location ... ... and click on browse. Look for USB VCOM Driver and Click on 2K_XP_COM folder if you are using Windows XP or Win7 for Windows 7 and then press OK when you are done picking the right folder for the driver.

3. If the driver is successfully installed MediaTek DA USB VCOM will appear in the New Hardware Wizard.
Video Installing VCOM Driver (please watch in HD)
Video Flashing your phone (please watch in HD)
Flashing
1. Launch FlashTool
2. Click on Scatter-Loading, and load your scatter file. (see example below with loaded file in Flash Tool


Video Reference Using FlashTool version 5.xxx (watch in HD)
3. After you load the file, press F9 or Press Download to Flash your Phone.
3. After you load the file, press F9 or Press Download to Flash your Phone.
4. If Download is not possible, you can press Firmware Upgrade.
5. After you press Download or Firmware Upgrade re-insert your battery and connect your Phone to the PC. Press Volume Down or Volume Up while connecting to PC.
"Hard reset your phone after flashing"
I hope this tutorial help you. Please drop a comment if something is not clear to you.
Cloudfone Excite 400dx Stock Rom Firmware to unbrick your phone
This firmware is for Cloudfone Excite 400dx. The stock rom is already rooted. The version of this rom is 4.2.2.

You can fix the following issue in your phone:
1. Bootloop
2. Damaged System UI
3. TP Upgrade only
4. Dead phone but it is detected in computer
5. Remove Gmail Account / Password / Pattern Lock (Alternative Way)
Firmware Here -->Cloudfone Excite 400dx
"Extract the files to your desired folder" See picture below"
"If you encounter error in flashtool, use different version of it."
Installing Driver
First try the Alternative Driver, which is the AutoInstaller. Just open the install.bat then it will automatically install the driver. Then proceed to flashing. If it did not work then proceed with VCOM driver that you had downloaded. Then install it manually follow the guide below.
Video Reference using Driver Auto Installer (watch in HD)
When installing it manually your phone must be turned off, then connect it to your computer/laptop while pressing VOLUME UP or VOLUME DOWN. This will detect and look for the driver.
1. This is the first time that you will connect your phone and it will search for the correct driver.
3. If the driver is successfully installed MediaTek DA USB VCOM will appear in the New Hardware Wizard.
Video Flashing your phone (please watch in HD)
Flashing
Video Reference Using FlashTool version 5.xxx (watch in HD)
3. After you load the file, press F9 or Press Download to Flash your Phone.
I hope this tutorial help you. Please drop a comment if something is not clear to you.
Read more »
You can fix the following issue in your phone:
1. Bootloop
2. Damaged System UI
3. TP Upgrade only
4. Dead phone but it is detected in computer
5. Remove Gmail Account / Password / Pattern Lock (Alternative Way)
Firmware Here -->Cloudfone Excite 400dx
VCOM Driver -->VCOM Manual
Alternative Driver --> AutoInstaller
Alternative Driver --> AutoInstaller
SPFlashTool --> SPFlashTool
SPFlashTool --> LatestVersion
"Extract the files to your desired folder" See picture below"
"If you encounter error in flashtool, use different version of it."
Installing Driver
First try the Alternative Driver, which is the AutoInstaller. Just open the install.bat then it will automatically install the driver. Then proceed to flashing. If it did not work then proceed with VCOM driver that you had downloaded. Then install it manually follow the guide below.
Video Reference using Driver Auto Installer (watch in HD)
When installing it manually your phone must be turned off, then connect it to your computer/laptop while pressing VOLUME UP or VOLUME DOWN. This will detect and look for the driver.
1. This is the first time that you will connect your phone and it will search for the correct driver.
2. Check include this location ... ... and click on browse. Look for USB VCOM Driver and Click on 2K_XP_COM folder if you are using Windows XP or Win7 for Windows 7 and then press OK when you are done picking the right folder for the driver.
3. If the driver is successfully installed MediaTek DA USB VCOM will appear in the New Hardware Wizard.
Video Installing VCOM Driver (please watch in HD)
Video Flashing your phone (please watch in HD)
"Your Phone must be turned off when you are ready to connect and flash your phone"
Flashing
1. Launch FlashTool
2. Click on Scatter-Loading, and load your scatter file. (see example below with loaded file in Flash Tool
Video Reference Using FlashTool version 5.xxx (watch in HD)
3. After you load the file, press F9 or Press Download to Flash your Phone.
4. If Download is not possible, you can press Firmware Upgrade.
5. After you press Download or Firmware Upgrade re-insert your battery and connect your Phone to the PC. Press Volume Down or Volume Up while connecting to PC.
Some workarounds:
Some workarounds:
If you encounter PMT_Changed error here is what you do:
In Older Version of FlashTool
- Load the scatter file
- Click in Format (a new menu will popup)
- Make sure that you select Format whole flash except bootloader then press OK
- Connect your phone in bootmode (Turn off your device then hold Volume UP or VOLUME DOWN then insert USB)
- It should detect your phone and continue to flash.
- Then Click Download to fully flash your phone.
- Hard Reset your phone after flashing.
- Load the scatter file
- Choose Format + Download (Underneath Scatter-loading file)
- Then Click Download and wait until it is done flashing
For Invalid IMEI:Your Phone/Tablet must be rooted first
Restore yong IMEI in MTKDroidTools version 2.5.3. You will have this error when you format your phone in Flashtool as I had experienced. To restore download MTKDroidTools version 2.5.3 After you extract the file. Open the green robot, you must enable the usb debugging in your phone. It is usually located in Settings>Devoloper Mode then look for usb debugging. After enabling it. Connect your phone in your computer then in MTKDroidTool click on ROOT. Wait for it to finish, then Click in IMEI/NVRAM, input 15 number in each box. Then click REPLACE. Then click Reboot or you can manually turn off your phone. Then turn your phone on again. You can see that you have fully restored your IMEI.
Restore yong IMEI in MTKDroidTools version 2.5.3. You will have this error when you format your phone in Flashtool as I had experienced. To restore download MTKDroidTools version 2.5.3 After you extract the file. Open the green robot, you must enable the usb debugging in your phone. It is usually located in Settings>Devoloper Mode then look for usb debugging. After enabling it. Connect your phone in your computer then in MTKDroidTool click on ROOT. Wait for it to finish, then Click in IMEI/NVRAM, input 15 number in each box. Then click REPLACE. Then click Reboot or you can manually turn off your phone. Then turn your phone on again. You can see that you have fully restored your IMEI.
"Hard reset your phone after flashing"
I hope this tutorial help you. Please drop a comment if something is not clear to you.
Monday, January 26, 2015
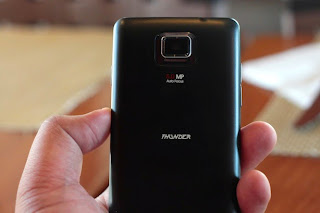
Cherry Mobile Thunder firmware stock rom to unbrick your phone
Hey,
I got a new firmware, this is for Cherry Mobile Thunder, this is not for Thunder 2.0, this is for Cherry Mobile Thunder only. This is flashable via Flashtool. There is a tutorial below that you can follow. Hope you fix your phone:)
Firmware Here -->Cherry Mobile Thunder
"Extract the files to your desired folder" See picture below"
"If you encounter error in flashtool, use different version of it."
Installing Driver
First try the Alternative Driver, which is the AutoInstaller. Just open the install.bat then it will automatically install the driver. Then proceed to flashing. If it did not work then proceed with VCOM driver that you had downloaded. Then install it manually follow the guide below.
Video Reference using Driver Auto Installer (watch in HD)
When installing it manually your phone must be turned off, then connect it to your computer/laptop while pressing VOLUME UP or VOLUME DOWN. This will detect and look for the driver.
1. This is the first time that you will connect your phone and it will search for the correct driver.
3. If the driver is successfully installed MediaTek DA USB VCOM will appear in the New Hardware Wizard.
Video Flashing your phone (please watch in HD)
Flashing
Video Reference Using FlashTool version 5.xxx (watch in HD)
3. After you load the file, press F9 or Press Download to Flash your Phone.
"Hard reset your phone after flashing"
I hope this tutorial help you. Please drop a comment if something is not clear to you.
Read more »
I got a new firmware, this is for Cherry Mobile Thunder, this is not for Thunder 2.0, this is for Cherry Mobile Thunder only. This is flashable via Flashtool. There is a tutorial below that you can follow. Hope you fix your phone:)
Firmware Here -->Cherry Mobile Thunder
VCOM Driver -->VCOM Manual
Alternative Driver --> AutoInstaller
SPFlashTool --> SPFlashTool
SPFlashTool --> SPFlashTool
SPFlashTool --> LatestVersion
"Extract the files to your desired folder" See picture below"
"If you encounter error in flashtool, use different version of it."
Installing Driver
First try the Alternative Driver, which is the AutoInstaller. Just open the install.bat then it will automatically install the driver. Then proceed to flashing. If it did not work then proceed with VCOM driver that you had downloaded. Then install it manually follow the guide below.
Video Reference using Driver Auto Installer (watch in HD)
When installing it manually your phone must be turned off, then connect it to your computer/laptop while pressing VOLUME UP or VOLUME DOWN. This will detect and look for the driver.
1. This is the first time that you will connect your phone and it will search for the correct driver.
2. Check include this location ... ... and click on browse. Look for USB VCOM Driver and Click on 2K_XP_COM folder if you are using Windows XP or Win7 for Windows 7 and then press OK when you are done picking the right folder for the driver.
3. If the driver is successfully installed MediaTek DA USB VCOM will appear in the New Hardware Wizard.
Video Installing VCOM Driver (please watch in HD)
Video Flashing your phone (please watch in HD)
Flashing
1. Launch FlashTool
2. Click on Scatter-Loading, and load your scatter file. (see example below with loaded file in Flash Tool
Video Reference Using FlashTool version 5.xxx (watch in HD)
3. After you load the file, press F9 or Press Download to Flash your Phone.
4. If Download is not possible, you can press Firmware Upgrade.
5. After you press Download or Firmware Upgrade re-insert your battery and connect your Phone to the PC. Press Volume Down or Volume Up while connecting to PC.
"Hard reset your phone after flashing"
I hope this tutorial help you. Please drop a comment if something is not clear to you.
Cherry Mobile Skyfire firmware stock rom to unbrick your phone
Yey!,

You can fix the following issue in your phone:
1. Bootloop
2. Damaged System UI
3. TP Upgrade only
4. Dead phone but it is detected in computer
5. Remove Gmail Account / Password / Pattern Lock (Alternative Way)
Firmware Here -->Cherry Mobile Skyfire
"Use WinRar or 7zip to extract the firmware"
"Extract the files to your desired folder" See picture below"
"If you encounter error in flashtool, use different version of it."
Installing Driver
First try the Alternative Driver, which is the AutoInstaller. Just open the install.bat then it will automatically install the driver. Then proceed to flashing. If it did not work then proceed with VCOM driver that you had downloaded. Then install it manually follow the guide below.
Video Reference using Driver Auto Installer (watch in HD)
When installing it manually your phone must be turned off, then connect it to your computer/laptop while pressing VOLUME UP or VOLUME DOWN. This will detect and look for the driver.
1. This is the first time that you will connect your phone and it will search for the correct driver.
3. If the driver is successfully installed MediaTek DA USB VCOM will appear in the New Hardware Wizard.
Video Flashing your phone (please watch in HD)
Flashing
Video Reference Using FlashTool version 5.xxx (watch in HD)
3. After you load the file, press F9 or Press Download to Flash your Phone.
I hope this tutorial help you. Please drop a comment if something is not clear to you.
Read more »
This firmware is for Cherry Mobile Skyfire only (MTK6577). This is not compatible with Skyfire 2.0. Because Skyfire 2.0 has a Qualcomm SoC.
You can fix the following issue in your phone:
1. Bootloop
2. Damaged System UI
3. TP Upgrade only
4. Dead phone but it is detected in computer
5. Remove Gmail Account / Password / Pattern Lock (Alternative Way)
Firmware Here -->Cherry Mobile Skyfire
VCOM Driver -->VCOM Manual
Alternative Driver --> AutoInstaller
Alternative Driver --> AutoInstaller
SPFlashTool --> SPFlashTool
SPFlashTool --> LatestVersion
"Use WinRar or 7zip to extract the firmware"
"Extract the files to your desired folder" See picture below"
"If you encounter error in flashtool, use different version of it."
Installing Driver
First try the Alternative Driver, which is the AutoInstaller. Just open the install.bat then it will automatically install the driver. Then proceed to flashing. If it did not work then proceed with VCOM driver that you had downloaded. Then install it manually follow the guide below.
Video Reference using Driver Auto Installer (watch in HD)
When installing it manually your phone must be turned off, then connect it to your computer/laptop while pressing VOLUME UP or VOLUME DOWN. This will detect and look for the driver.
1. This is the first time that you will connect your phone and it will search for the correct driver.
2. Check include this location ... ... and click on browse. Look for USB VCOM Driver and Click on 2K_XP_COM folder if you are using Windows XP or Win7 for Windows 7 and then press OK when you are done picking the right folder for the driver.
3. If the driver is successfully installed MediaTek DA USB VCOM will appear in the New Hardware Wizard.
Video Installing VCOM Driver (please watch in HD)
Video Flashing your phone (please watch in HD)
"Your Phone must be turned off when you are ready to connect and flash your phone"
Flashing
1. Launch FlashTool
2. Click on Scatter-Loading, and load your scatter file. (see example below with loaded file in Flash Tool
Video Reference Using FlashTool version 5.xxx (watch in HD)
3. After you load the file, press F9 or Press Download to Flash your Phone.
4. If Download is not possible, you can press Firmware Upgrade.
5. After you press Download or Firmware Upgrade re-insert your battery and connect your Phone to the PC. Press Volume Down or Volume Up while connecting to PC.
Some workarounds:
Some workarounds:
If you encounter PMT_Changed error here is what you do:
In Older Version of FlashTool
- Load the scatter file
- Click in Format (a new menu will popup)
- Make sure that you select Format whole flash except bootloader then press OK
- Connect your phone in bootmode (Turn off your device then hold Volume UP or VOLUME DOWN then insert USB)
- It should detect your phone and continue to flash.
- Then Click Download to fully flash your phone.
- Hard Reset your phone after flashing.
- Load the scatter file
- Choose Format + Download (Underneath Scatter-loading file)
- Then Click Download and wait until it is done flashing
For Invalid IMEI:Your Phone/Tablet must be rooted first
Restore yong IMEI in MTKDroidTools version 2.5.3. You will have this error when you format your phone in Flashtool as I had experienced. To restore download MTKDroidTools version 2.5.3 After you extract the file. Open the green robot, you must enable the usb debugging in your phone. It is usually located in Settings>Devoloper Mode then look for usb debugging. After enabling it. Connect your phone in your computer then in MTKDroidTool click on ROOT. Wait for it to finish, then Click in IMEI/NVRAM, input 15 number in each box. Then click REPLACE. Then click Reboot or you can manually turn off your phone. Then turn your phone on again. You can see that you have fully restored your IMEI.
Restore yong IMEI in MTKDroidTools version 2.5.3. You will have this error when you format your phone in Flashtool as I had experienced. To restore download MTKDroidTools version 2.5.3 After you extract the file. Open the green robot, you must enable the usb debugging in your phone. It is usually located in Settings>Devoloper Mode then look for usb debugging. After enabling it. Connect your phone in your computer then in MTKDroidTool click on ROOT. Wait for it to finish, then Click in IMEI/NVRAM, input 15 number in each box. Then click REPLACE. Then click Reboot or you can manually turn off your phone. Then turn your phone on again. You can see that you have fully restored your IMEI.
"Hard reset your phone after flashing"
I hope this tutorial help you. Please drop a comment if something is not clear to you.
Saturday, January 24, 2015
Cherry Mobile Emerald Stock ROM Firmware to unbrick your phone
Im done uploading the firmware for Cherry Mobile Emerald, this is version 4.2.2 Jellybean not the Kitkat version. You can however update in Kitkat after recovering your phone. This is flashable via SP Flash Tool. You can download the SP Flash Tool in the right corner of my blog which is the tool section.

Firmware Here --> CM Emerald
VCOM Driver --> PDANET
Alternative Driver --> AutoInstaller
SPFlashTool --> SPFlashTool
"Extract the files to your desired folder"
"If the SPFlashtool did not work you can try other version of it"
You can fix the following issue with this firmware:
1. Bootloop
2. Stuck in Logo
3. Password Removal (alternative way)
4. Gmail Account Removal (alternative way)
5. Damage SystemUI
6. Forced Close Apps
Installing Driver
First try the Alternative Driver, which is the AutoInstaller. Just open the install.bat then it will automatically install the driver. Then proceed to flashing. If it did not work then proceed with VCOM driver that you had downloaded. Then install it manually follow the guide below.
Reference Video Installing the Driver using AutoInstaller (watch it in HD)
When installing it manually your phone must be turned off, then connect it to your computer/laptop while pressing VOLUME UP or VOLUME DOWN. This will detect and look for the driver.
1. This is the first time that you will connect your phone and it will search for the correct driver. You can connect your phone without battery in it.
2. Check include this location ... ... and click on browse. Look for USB VCOM Driver and Click on 2K_XP_COM folder if you are using Windows XP or Win7 for Windows 7 and then press OK when you are done picking the right folder for the driver.
3. If the driver is successfully installed MediaTek DA USB VCOM will appear in the New Hardware Wizard.
Reference Video Installing the Driver (watch it in HD)
Reference Video Flashing your phone (watch it in HD)
"You can skip installing driver if you already have it"
IMPORTANT: After flashing it may ask to upgrade your touch panel, After pressing YES, DO NOT EVER TOUCH THE TOUCH PANEL, TOUCH PANEL WILL NOT WORK IF YOU PRESS THE TOUCH PANEL ACCIDENTALLY. As other tried to flash their phone and experienced this kind of problem.
Flashing
1. Launch FlashTool
2. Click on Scatter-Loading, and load your scatter file. (see example below with loaded file in Flash Tool
Reference Video using Flashtool version 5.xxx (watch it in HD)
3. After you load the file, press F9 or Press Download to Flash your Phone.
4. If Download it is not possible, you can press Firmware Upgrade. If Firmware Upgrade is not possible then Press Format, make sure that you select except bootloader then press OK. Then connect your phone. Press VOLUME UP and VOLUME DOWN and insert your USB Cable. Formatting will be quick it will only take a second.
I hope this tutorial help you. Please drop a comment if something is not clear to you.
Read more »
Firmware Here --> CM Emerald
VCOM Driver --> PDANET
Alternative Driver --> AutoInstaller
SPFlashTool --> SPFlashTool
"Extract the files to your desired folder"
"If the SPFlashtool did not work you can try other version of it"
You can fix the following issue with this firmware:
1. Bootloop
2. Stuck in Logo
3. Password Removal (alternative way)
4. Gmail Account Removal (alternative way)
5. Damage SystemUI
6. Forced Close Apps
Installing Driver
First try the Alternative Driver, which is the AutoInstaller. Just open the install.bat then it will automatically install the driver. Then proceed to flashing. If it did not work then proceed with VCOM driver that you had downloaded. Then install it manually follow the guide below.
Reference Video Installing the Driver using AutoInstaller (watch it in HD)
When installing it manually your phone must be turned off, then connect it to your computer/laptop while pressing VOLUME UP or VOLUME DOWN. This will detect and look for the driver.
1. This is the first time that you will connect your phone and it will search for the correct driver. You can connect your phone without battery in it.
3. If the driver is successfully installed MediaTek DA USB VCOM will appear in the New Hardware Wizard.
Reference Video Installing the Driver (watch it in HD)
Reference Video Flashing your phone (watch it in HD)
"You can skip installing driver if you already have it"
IMPORTANT: After flashing it may ask to upgrade your touch panel, After pressing YES, DO NOT EVER TOUCH THE TOUCH PANEL, TOUCH PANEL WILL NOT WORK IF YOU PRESS THE TOUCH PANEL ACCIDENTALLY. As other tried to flash their phone and experienced this kind of problem.
Flashing
1. Launch FlashTool
2. Click on Scatter-Loading, and load your scatter file. (see example below with loaded file in Flash Tool
3. After you load the file, press F9 or Press Download to Flash your Phone.
4. If Download it is not possible, you can press Firmware Upgrade. If Firmware Upgrade is not possible then Press Format, make sure that you select except bootloader then press OK. Then connect your phone. Press VOLUME UP and VOLUME DOWN and insert your USB Cable. Formatting will be quick it will only take a second.
5. Proceed fully flashing your phone. Press Download After you press Download re-insert your battery and connect your Phone to the PC. Press Volume Down or Volume Up while connecting to PC. And wait until the progress bar reaches 100%
Tested by: (see comment box)
Neil
Nico Garcia
For Invalid IMEI: Your Phone/Tablet must be rooted first
1. Hard Reset your Phone first via Stock Recovery.
2.Restore your IMEI in MTKDroidTools version 2.5.3. You will have this error when you format your phone in Flashtool as I had experienced. To restore download MTKDroidTools version 2.5.3 After you extract the file. Open the green robot, you must enable the usb debugging in your phone. It is usually located in Settings>Devoloper Mode then look for usb debugging. After enabling it. Connect your phone in your computer then in MTKDroidTool click on ROOT. Wait for it to finish, then Click in IMEI/NVRAM, input 15 number in each box. Then click REPLACE. Then click Reboot or you can manually turn off your phone. Then turn your phone on again. You can see that you have fully restored your IMEI.
1. Hard Reset your Phone first via Stock Recovery.
2.Restore your IMEI in MTKDroidTools version 2.5.3. You will have this error when you format your phone in Flashtool as I had experienced. To restore download MTKDroidTools version 2.5.3 After you extract the file. Open the green robot, you must enable the usb debugging in your phone. It is usually located in Settings>Devoloper Mode then look for usb debugging. After enabling it. Connect your phone in your computer then in MTKDroidTool click on ROOT. Wait for it to finish, then Click in IMEI/NVRAM, input 15 number in each box. Then click REPLACE. Then click Reboot or you can manually turn off your phone. Then turn your phone on again. You can see that you have fully restored your IMEI.
Tested by: (see comment box)
Neil
Nico Garcia
I hope this tutorial help you. Please drop a comment if something is not clear to you.
Friday, January 23, 2015
Hard Reset your Star Mobile Vida and remove password pattern lock gmail account
The Star Mobile Vida dropped by in my workplace and I made a tutorial in how to hard reset your Star Mobile Vida.

Hard resetting / factory resetting your phone will solve the following issues:
1. If you forgot your pattern lock
2. If you forgot your gmail account
3. If you forgot your password
4. Apps that automatically force closing
5. Stuck in Star Mobile Logo (sometimes does not work if the firmware is totally damage)
NOTE: Performing hard reset will erase your data.
To hard reset:
1. Turn off your phone.
2. Press and Hold VOLUME DOWN and Power Button simultaneously and wait for it to power on but keep holding the button until you see the engineering mode
3. Engineering mode will appear.
4.Select CLEAR eMMC, press Volume rocker to navigate and press the POWER Button to confirm your selection
5. Reboot your phone.
I hope this tutorial helps you.. If you have any question just drop a comment.
Read more »
Hard resetting / factory resetting your phone will solve the following issues:
1. If you forgot your pattern lock
2. If you forgot your gmail account
3. If you forgot your password
4. Apps that automatically force closing
5. Stuck in Star Mobile Logo (sometimes does not work if the firmware is totally damage)
NOTE: Performing hard reset will erase your data.
To hard reset:
1. Turn off your phone.
2. Press and Hold VOLUME DOWN and Power Button simultaneously and wait for it to power on but keep holding the button until you see the engineering mode
3. Engineering mode will appear.
4.Select CLEAR eMMC, press Volume rocker to navigate and press the POWER Button to confirm your selection
5. Reboot your phone.
I hope this tutorial helps you.. If you have any question just drop a comment.
Subscribe to:
Posts (Atom)